apr 23, 2023

🔗 Update the gradient icon colors dynamically
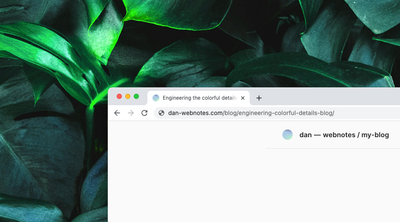
I really like the tiny coloured circle, this post explains what I learned from trying to put it in places that require some hacks to have it change colors dynamically.
The gradient inside the circle is generated as a background-image css property, and it's a combination of a radial gradient and a linear gradient. I explained this technique in a previous post:
A technique for generating beautiful color gradients .
The css property is applied to a specific css class I named .gradient which I use in different places around the website HTML, this way I thought I could easily change the gradient colors and at the same time apply it freely wherever I wanted independently of the container.
# Javascript and pseudo-elements
The first place where adding the colorful dot makes more sense is internal links, if a link is pointing to another post in the blog I want to apply the small piece of branding, fair and simple. I already tackled the first part of this issue in this previous post How to build a minimalist Markdown blog with Eleventy, what I had in mind was to add a :before pseudo-element to the link and style it with the current gradient.
The first part was easy, I edited the function I already wrote in eleventy.config.js, changing it from this:
mdLib.use(markdownItLinks, {
	processHTML: true, // defaults to false for backwards compatibility
	replaceLink: function (link, env, token, htmlToken) {
		if (link.includes(".md")) {
			// remove the content after the last slash
			const newLink = link.replace(/[^/]*$/, "");
			return newLink;
		}
		return link;
	},
});
to this, where I still change the link but also the class attribute to add my own custom class .gradient-before to which I will add a pseudo-element:
mdLib.use(markdownItLinks, {
	processHTML: true, // defaults to false for backwards compatibility
	replaceLink: function (link, env, token, htmlToken) {
		if (link.includes(".md")) {
			// remove the content after the last slash
			const newLink = link.replace(/[^/]*$/, "");
			// add class to the link
			const newToken = token;
			newToken.attrs = [
				["href", newLink],
				["class", "gradient-before"],
			];
			return newToken;
		}
		return link;
	},
});
Now I just needed to target the .gradient-before::before pseudo-element in my javascript and it would have been done, but nope, TIL that pseudo-elements are not part of the DOM and therefore can't be accessed from javascript, so I had to find another way to do it.
A solution from Stack Overflow was to generate dynamically a <style> tag with the css property I wanted to apply to .gradient-before::before and this is what I ended up with:
// style pseudo elements for internal links by adding a new stylesheet
const gradientStyleSheet =
	document.querySelector("#gradientStyleSheet") ||
	document.head.appendChild(document.createElement("style"));

gradientStyleSheet.setAttribute("id", "gradientStyleSheet");
gradientStyleSheet.innerHTML = `.gradient-before:before {background: ${cssGradient};}`;
And that worked smoothly! You maybe noticed them in action in this very post, the links to other blog posts have the coloured dot just before them, and if you toggle new colours in the homepage they will change throughout the blog.
# Update favicons with javascript
The next step is to have the favicon too change dynamically with the picked gradient colours, but I wasn't even sure if it was possible, after all favicons are static files, right?
It turns out that it is actually possible, I found a great tutorial on CSS Tricks, How to Create a Favicon That Changes Automatically that explains just how to do it thanks to SVG favicons.
⚠️ Warning:
As of today, SVG favicons are supported by all modern browsers with the only exception of Safari both on desktop and mobile.
Using javascript we can target the favicon <link> tag in the <head> of the HTML and change the href attribute to instead of pointing to an asset url, we embed the new file directly by changing the attribute to a data URI that contains the favicon svg with the new colours.
// style favicon by creating a svg and converting it to a data url of the favicon
const faviconHref = `data:image/svg+xml,%3Csvg xmlns='http://www.w3.org/2000/svg' width='50' height='50'%3E%3Cdefs%3E%3CradialGradient id='b' gradientTransform='matrix(2 0 0 2 -1 -.5)'%3E%3Cstop offset='19%25' stop-color='${encodeURIComponent(array[2])}'/%3E%3Cstop offset='39.25%25' stop-color='${encodeURIComponent(array[2])}' stop-opacity='0.75'/%3E%3Cstop offset='59.5%25' stop-color='${encodeURIComponent(array[2])}' stop-opacity='0.5'/%3E%3Cstop offset='100%25' stop-color='${encodeURIComponent(array[2])}' stop-opacity='0'/%3E%3C/radialGradient%3E%3ClinearGradient id='a' x1='.5' x2='.5' y1='0' y2='1'%3E%3Cstop offset='0%25' stop-color='${encodeURIComponent(array[0])}'/%3E%3Cstop offset='22%25' stop-color='${encodeURIComponent(array[1])}'/%3E%3Cstop offset='45%25' stop-color='${encodeURIComponent(array[2])}'/%3E%3Cstop offset='57%25' stop-color='${encodeURIComponent(array[3])}'/%3E%3Cstop offset='76%25' stop-color='${encodeURIComponent(array[4])}'/%3E%3Cstop offset='94%25' stop-color='${encodeURIComponent(array[5])}'/%3E%3C/linearGradient%3E%3C/defs%3E%3Ccircle cx='50%25' cy='50%25' r='50%25' fill='url(%23a)'/%3E%3Ccircle cx='50%25' cy='50%25' r='50%25' fill='url(%23b)'/%3E%3C/svg%3E`

// Ensure we have access to the document, i.e. we are in the browser.
if (typeof window === "undefined") return;

const favicon =
	document.querySelector("link[rel*='icon']") ||
	document.head.appendChild(document.createElement("link"));

favicon.type = "image/svg+xml";
favicon.rel = "icon";
favicon.href = faviconHref;