dec 29, 2023
🔗 Wiring the Sonoff inside the Ender Power Supply Unit
The last missing piece to this project is to wire the Sonoff to have it sit nicely inside the Ender Power Supply Unit. But of course they wouldn't both fit inside the original case, so I had to design and print a new one.
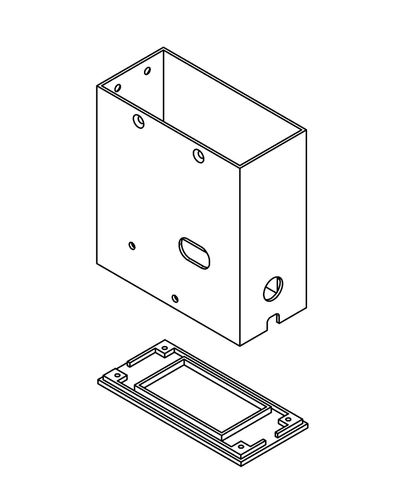 Technical drawing of the 3d-printed case
The goal of this project is to have a 3D printer that can auto-shutdown, I explained how in this post: Auto-shutdown a 3D printer with Raspberry Pi and ESPHome. To achieve this I have to make the power cable go through the Sonoff before it reaches the Ender Power Supply Unit, the PSU in turn powers the Ender and the Raspberry Pi running Octoprint.
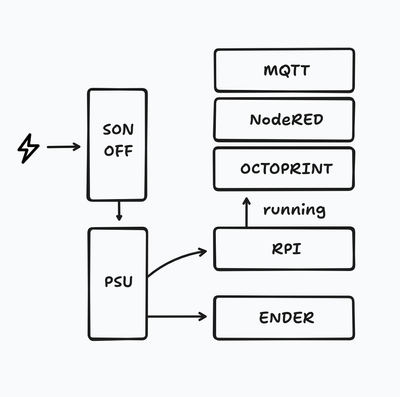
The Octoprint server, once a print is done will be able to turn off the whole system by sending a MQTT message to a MQTT topic the Sonoff is subscribed to. I found this Octoprint plugin that suits my needs, OctoPrint/OctoPrint-MQTT.
I haven't put in place a system to turn the printer on remotely. If I wanted to, I'd need to setup another MQTT broker on another device and have the Sonoff subscribe to another topic, but I'm not interested in doing that at the moment, so i opted to add a momentary button to the Sonoff to turn the printer on and off. It is fairly easy to add one using the available pins on the PCB.
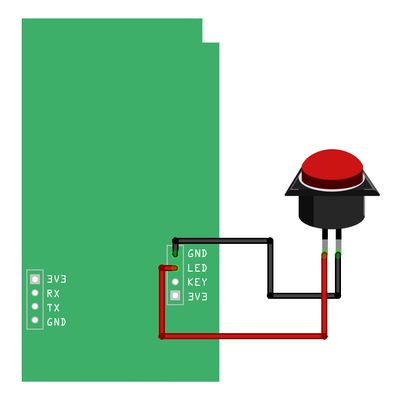 Schematics for adding a button to the Sonoff PCB
Also Esphome makes it very easy to add a physical button by configuring it as a Binary sensor, just add this snippet to the configuration file, recompile the project and flash it to the device.
binary_sensor:
  - platform: gpio
    name: button
    pin:
      number: GPIO0
    filters:
      - delayed_on: 10ms
    on_press:
      then:
        - if:
            condition:
              switch.is_on: mains
            then:
              - mqtt.publish:
                  topic: octoprint/shutdown
                  payload: "OFF"
              - delay: 60s
              - switch.turn_off: mains
            else:
              - logger.log: "start up mains"
              - switch.turn_on: mains
I enjoyed the physical part of this project, I had to combine some coding with some 3D design, plus the necessary crimping and soldering of the electronics. I'm happy with the result.
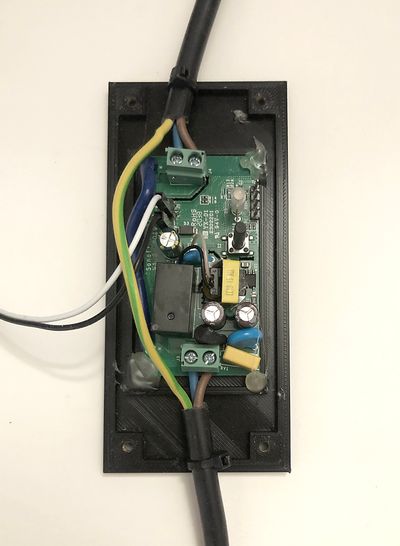 The Sonoff at the bottom of the case
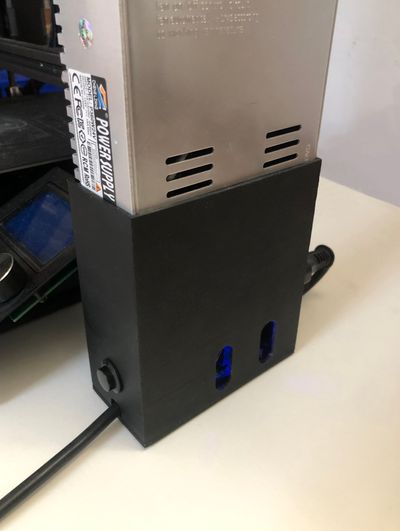 The final result